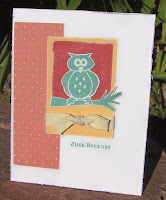
Here is a sneak peek at the November Word Puzzle pages. I will post the entire pages later. As you can see the colors are unexpected for "fall", but still work really well.


Finally cut or punch tabs for the top of the box and punch holes in them to string your ribbon through. On this bag I used 2 holes, but on the Holiday bags I used a single hole.
All that's left to do is decorate and embellish your bag however you like. Fill with goodies and tie it all together with ribbon.


 So I had to play with my new Cuttlebug skeleton embossing folder. I also used the Lasting Impressions skeleton embossing template layered on black cardstock and placed on the olive scroll embossed cardstock. I had to do some paper piecing and sanding to get the skull to turn out just right. Finally I finished the edge with "Happy Halloween" embossed in white powder and a piece of black stitched ribbon.


 I originally saw this idea in my kids lunchables, (Star Wars themed flip card) and looked at it several times curious of how to re-create it in a larger version. Then I saw another consultants version of it and she had instructions to share...Thanks Lisa! At first I thought it would be very tricky and somewhat complicated, but in reality it is a very simple assembly. The majority of the time is spent on decorating each page. What a cool idea, I might just make some more for the Holidays!!


But, that's not all! I also made a dozen goodie bags filled with Classic Chocolate Chip Cookies. These were made with a 5x12 sheet of card stock with a hole cut out of the center front to showcase the yummy cookies inside. I stamped the apple and sentiment from the September Word Puzzle stamp and finished it with some twine. The school asked to have all baked goods packaged individually, so I think these qualify!


