Sunday, March 13, 2011

Birthday Party 2011 ~ Decorations

This was the scene that welcomed guests as they arrived to the party. The Mad Hatter was there as well as the Queen of Hearts. Look at the ceiling though and you'll see the fun paper globes.


Here is a closer look~


Doesn't the Queen look just like the one from the movie? She's so cool.

In the kitchen nook we hung some different lanterns in fantastic bright colors. I actually make larger versions of these with our first graders using construction paper. You could also set little battery operated tea lights inside of them and set them on a tabletop rather than hang them.


Curious what goodies are set out on the table? Come back tomorrow for the Birthday finale to see the food and fun we served up on this memorable day!


"Curious~er and Curious~er"

Friday, March 11, 2011

Birthday Party 2011 ~ Invites

As promised, more party pics! Well not actually the party, that happens tomorrow! However, I do have pictures of the invitations that were sent out weeks ago.

I did a full 12x12 sheet of card stock with a pattern stamping. I used one of the flourishes from the Wings Workshop on the Go stamp set. I did lots of rock & rolling to create a 'wave' of colors. Like a rainbow each color blends into the other. Once the entire sheet was covered I cut them into 2x5 inch sections. Lots of new summer colors here too; pear, sky, sunset, cotton candy, lagoon and sunflower.


I then adhered the stamped sections onto black card stock and then on a white card base. I used the Trees & Things stamp to create a banner of lanterns and simply stamped a sentiment. Here they are~


Here are just a few samples so that you can see how each card turns out so unique. Some have more yellow's and oranges, while others are blue and green or pink and purple!


I'm simply "Mad" for this technique! More of our "Mad Tea Party" pics coming soon!!

Thursday, March 10, 2011

Creating the Scene

Heart 2 Heart challenge this week is to create a scene using 3 different stamps. Here is the scene that we are truly preparing for this weekend!

It is my daughters 12th Birthday and I have been preparing for the last couple of weeks. She is having a Mad Tea Party, inspired by the Alice in Wonderland movie. {the Tim Burton version} Here is a pic I sent out to friends and family as a reminder for the party.


Looove Johnny Depp, he is one of my faves! My daughter also has the full size cardboard figure of "Jacob" from Twilight. He's a cutie even in cardboard form! Ha!

For this card we have a scene in the backyard. Our trees just started blooming this week and the grass is getting green. I have made fun lanterns to hang just as you see here in the stamp set. I pulled out an older "family" stamp set to represent my daughter. How appropriate that the little girl is holding a phone!


Check out the Party Time pull tag!


Check back soon as I will post all the fun projects I've made including paper lanterns, invitations, Mad Hatter hats and more!

Wednesday, March 9, 2011

Fun with the Scallop Punch

I'm having lots of fun with the new 2" scallop punch from Close To My Heart. There are so many creative possibilities!


Here is one idea that I just loved from the very talented Lisa Stenz. She uses the punch as the icing of a cupcake. A pleated wrapper and a sparkly cherry on top finishes this card perfectly.


Another idea is to punch B&T paper then fold them in half to create a banner. So simple and cute. I also love the new phrases from the Birthday Card Chatter stamp.


Here is the inside~


I have also created 3 different types of flowers using this punch which will be featured on upcoming Card Club cards. You'll have to wait to see those lovelies!

Thursday, March 3, 2011

H2H Color Challenge ~ Spring Inspired

It's a color challenge on H2H this week. The first thing I thought of when I saw these colors was Halloween. Not the right season though so I looked to Spring inspiration. I was recently delivered this catalog from Yankee Candle and immediately found my inspiration. I had to add just a bit of Tulip to this color palette; for the tulips of course!

Here is the card~


This was my inspiration~

How cute are these ceramic rain boots. They hold a tea light candle. I love the little ducks with their umbrellas too! The Spring Days candle is a wonderful scent also. The catalog is scratch and sniff, how funny is that! It makes perfect "scents" though!!


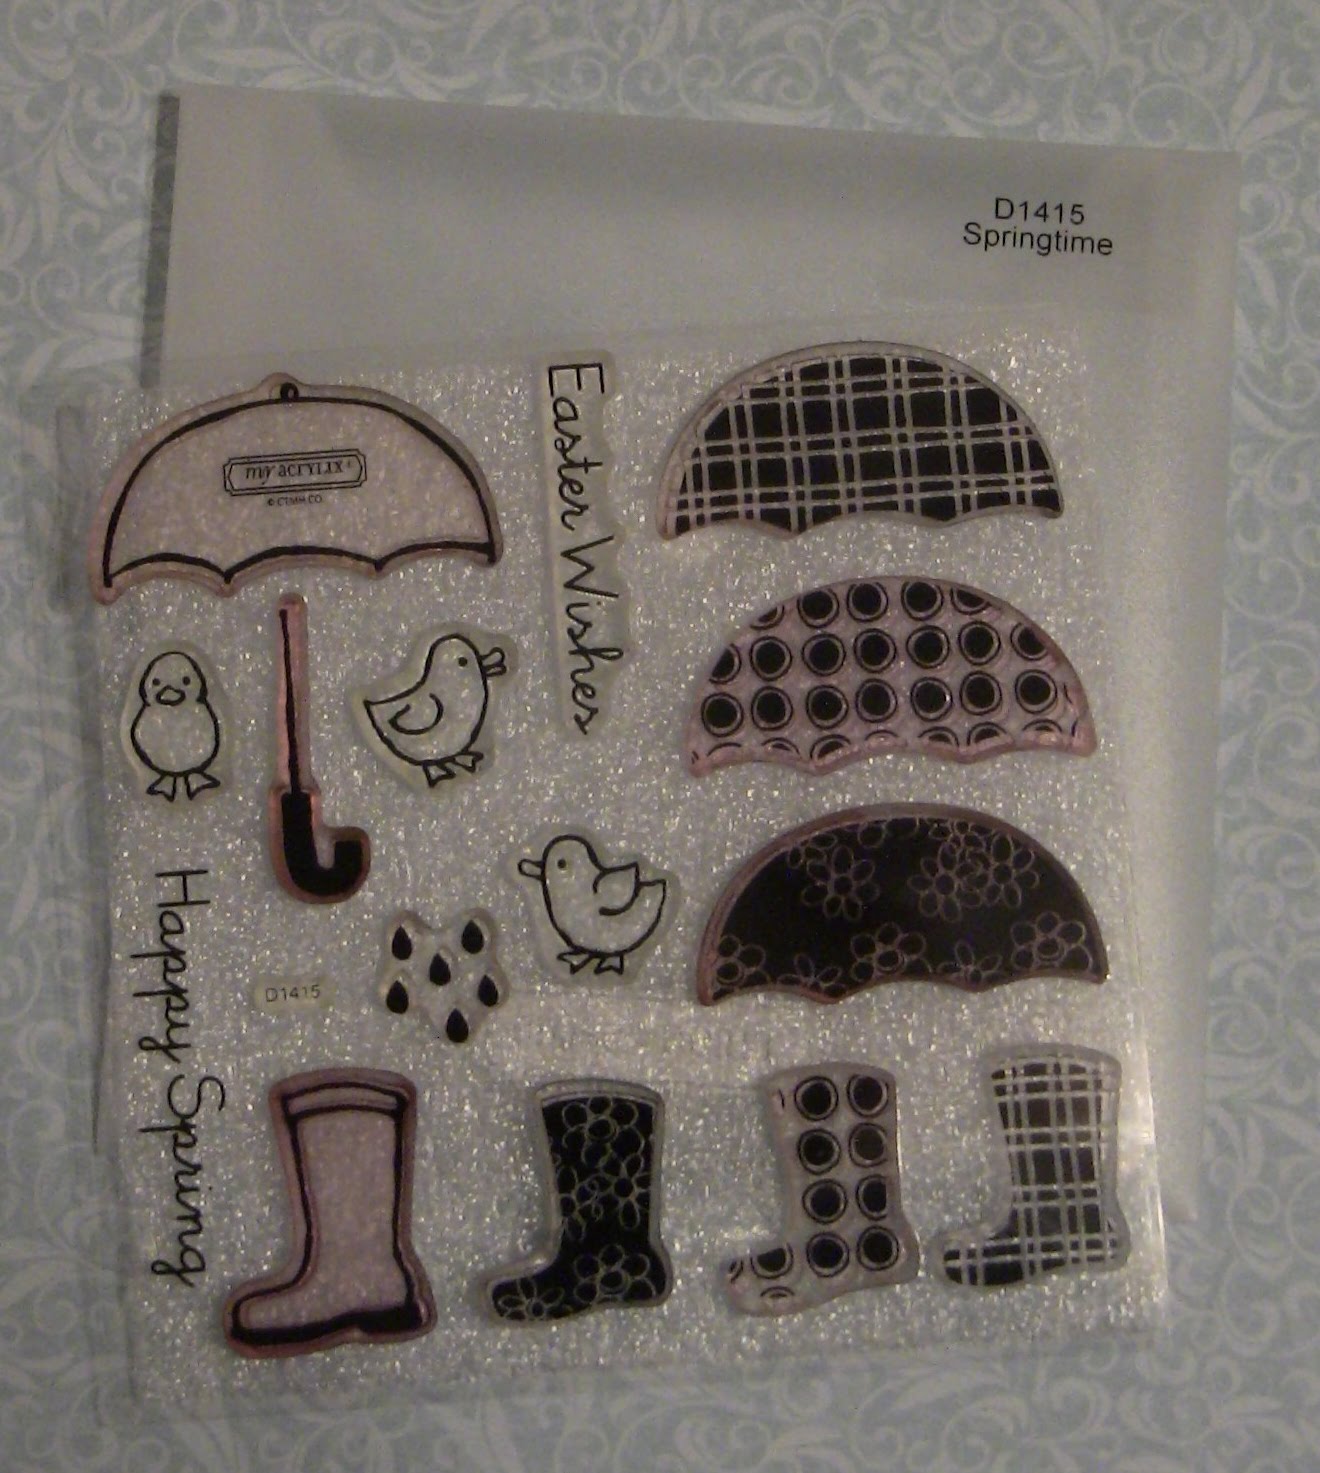
My stamp of choice for creating this card was the Springtime stamp D1415. You can find it on page 51 in the Spring 2011 Idea Book.

Tuesday, March 1, 2011

March Promotion


During the month of March you can earn free blocks! When you purchase $25 in My Acrylix stamps {sizes A, B, C, D & E} you can choose from two of the most versatile My Acrylix blocks 3x3 or 2 x 6 1/2. The retail value of these blocks are 8.50 & 9.95, but with your stamp purchase you can choose one for FREE! What a fabulous promotion!
You can view stamps in the current Idea Book on the right hand side of this blog. I will also be posting artwork with some of my favorite stamp sets all month long. You will also see artwork from my friends and customers later this month as I will be hosting a spring card exchange.

Sunday, February 27, 2011

A "Cool" New Product + {H2H Challenge}

I've been experimenting this weekend with a fun new product in the Spring Idea Book. The Color Ready Kraft Borders are wonderful. Some great features of this product are that the cutting is done for you already as is the adhesive as you simply peel and stick. Love that! They come in a 12" length so they are perfect for scrapbook pages or you can simply cut them down to fit any project you are working on. They are extremely versatile in the ways you can add color also. Here are a few samples I've discovered so far.


This first card was done for the H2H challenge this week. Create something that reminds you of the word "cold". Brrrr! The surrounding mountains look beautiful with a dusting of snow, but quite frankly I'm looking forward to spring and summer. I took inspiration from H2H designer Lisa Stenz this week and opted for a chilly ice cream treat. That's deliciously cold!


For the color ready border on this card I used white acrylic paint mixed with 4-5 drops of Crystal Blue re-inker. I cut the border to the length I needed then painted it and allowed it to dry.

On this next project I directly inked the border on a Cranberry ink pad. I also left it at the 12" length to fit my scrapbook page. This is my end of year pocket page that I have been completing my albums with for a couple years now. I love filling the pocket with special homemade cards and photo's that friends and family have sent for the Holidays.


How cute is this cup cake card? The image is from the same stamp I used on the ice cream cone card. My daughter loved this card when I completed it. My guess is that the border is her favorite color, bright green! Any guesses on how I colored them green? Can you find the other border piece I used?


Here is the other border piece! It's perfect as a little Birthday candle. I left it plain with no added color.

The green border piece was colored with....did you guess it.....CHALK!

Because of the texture of the border, after applying the chalk, the finished piece looks a bit like felt. I experimented with a few chalk colors and really liked the result of the brighter colors. The hot pink really popped, the blue was calming and it even took on a subtle change of color with a really bright yellow. My favorite was the bright green though and I knew my daughter would approve!

Finally, a gorgeous card done with the mellow Miracle papers. I simply left the kraft border in it's natural state. It really adds to the beauty of this card and it was only a matter of trimming, peeling and placing. How easy is that?!


Did I mention there are 50 borders in a package for under $6? Wow, you have to try this product!

Friday, February 25, 2011

Calendar Club {February & March}

When my Calendar Club meets next time they will be creating the February and March pages. For February we made the focus on Valentine's Day and LOVE! Sweetheart floral papers are perfect! Club members received the new spritz pen at the first meeting, so we will use it again for this month. This time we fill it with Hollyhock re-inker and the shimmer paint to add a bit of sparkle. Did you know that you can spritz directly on our paper flowers to add some color? You bet we can, it really makes them come to life!


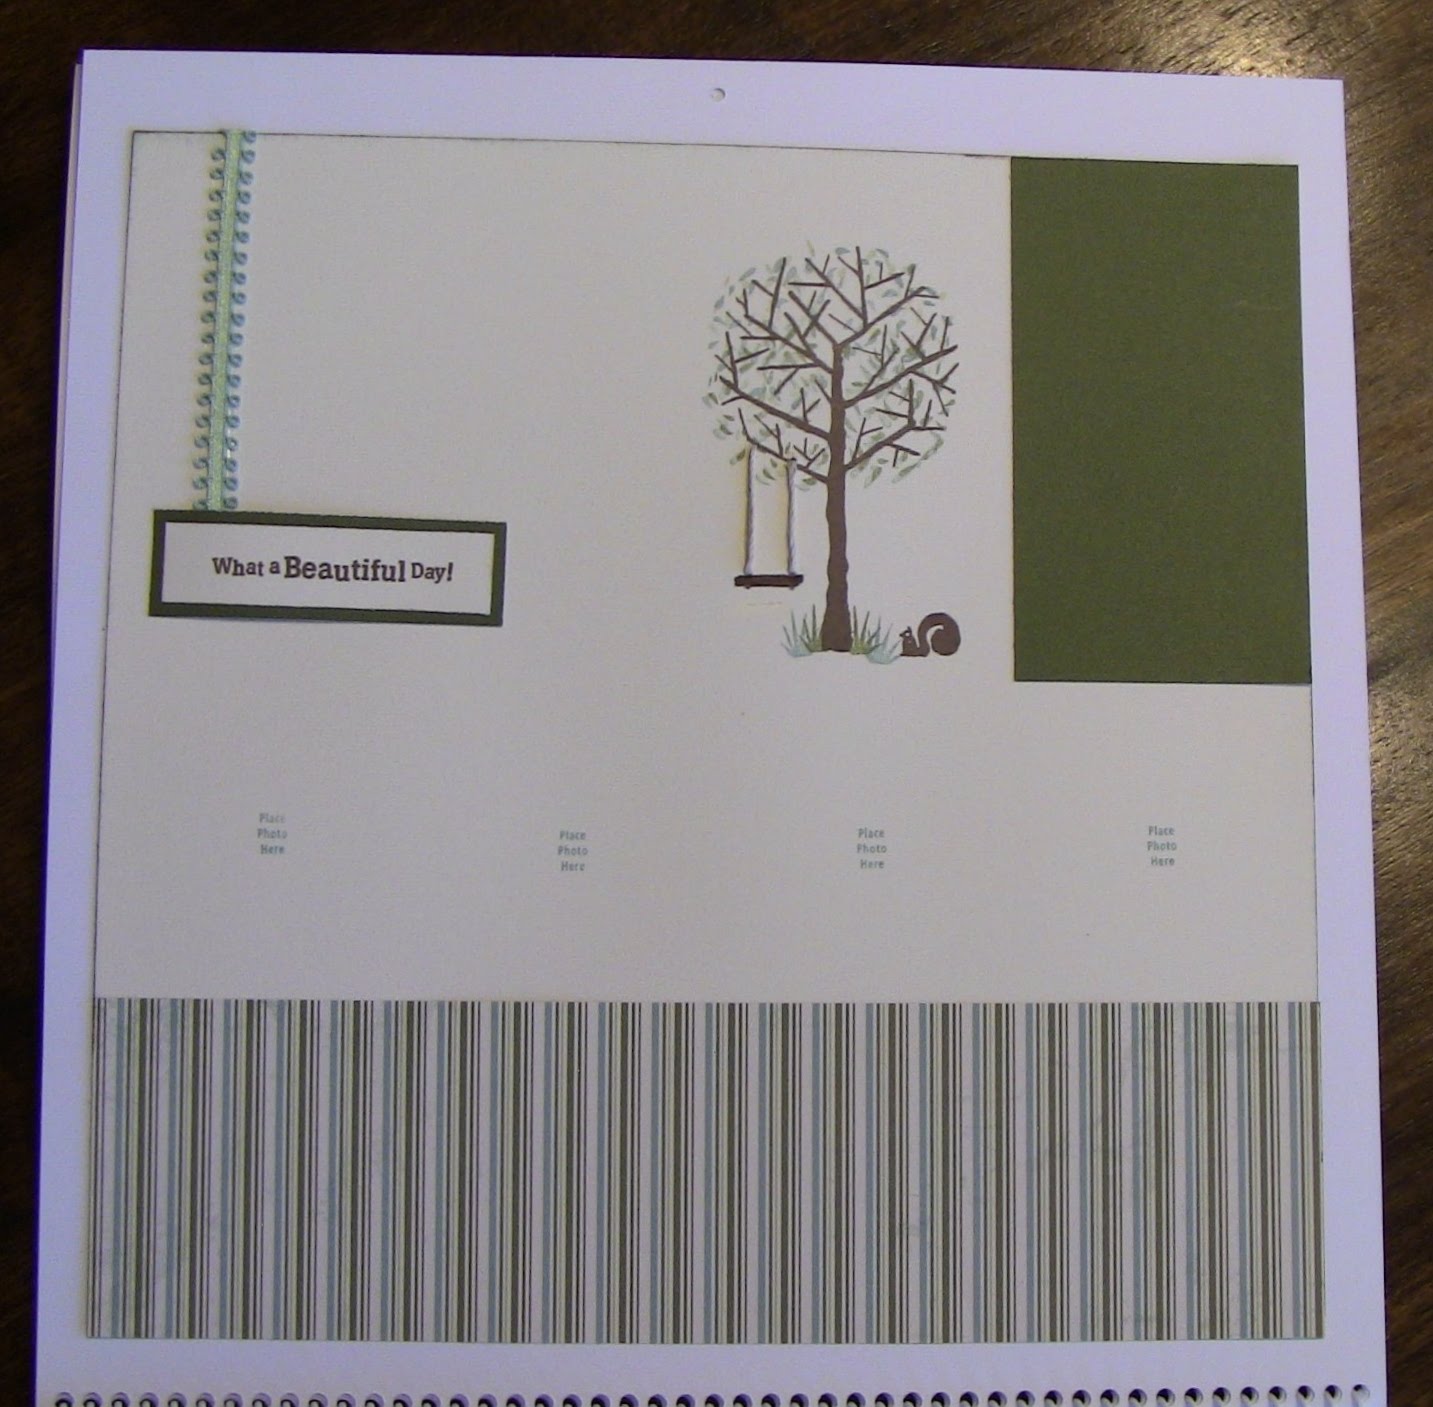
The March page incorporates that fabulous Trees & Things stamp that I featured here on my blog last week. I stamped the leaves in Juniper and Olive to match the Wings Basics papers. The little swing was hung on some hemp that has been tucked behind the page. This page is also unique because instead of one photo you can feature 4 of your favorite snap shots.

Wednesday, February 23, 2011

Wings Level 1 Workshop

This Friday I am hosting a Level 1 Workshop using the gorgeous papers in the Wings level 1 kit. This workshop is perfect for those scrappers that are fairly new to the craft or simply do not have much time.

The kit contains everything you need to create 2 ~ two page layouts. There are four base pages that you will build on with some of the B&T papers included and the Stickease.


As you can see in these pages how much more they pop once your photo's are added. What you are not able to see in this photo is that I used dimensional foam pieces behind the Stickease title and flowers giving the embellishments more life.


Monday, February 21, 2011

Quilted {a "R" t} with Sophia

My daughter picked out this great big "R" some time ago to decorate her room. It sat in a closet for awhile until we decided on the perfect papers that we wanted to finish it with. When the new Spring Idea Book arrived we knew right away that the Sophia papers were perfect. My daughter's favorite color is lime green and the polka dot papers in this kit were "spot" on! The pinks, yellows and patterns were also exactly what she wanted.

Before~


As you can see here on the finished project I decided on a quilted pattern. Having the 3x3 squares placed on a diagonal presented quite the challenge, especially on the curved portion of the "R". After adhering all the paper pieces on the front and sides I used Mod Podge to seal them in place. Once the Mod Podge sealed it really made the paper appear to look like fabric.


You can really see how large it is here as she poses with it!


Here it is on her headboard. Eventually we want to get more "R"s of various sizes and styles and decorate an entire wall in her room!


Friday, February 18, 2011

Trees & Things

Many new stamps caught my eye in the Spring Idea Book, but this one I knew would be one of the most fun. It's called Trees & Things and that's just what it is. You can create the tree for spring, summer, fall and winter. It has oodles of little fun items to add like this bird and a tire swing. Some other fun images include a hammock, lanterns, string of lights and even a squirrel!

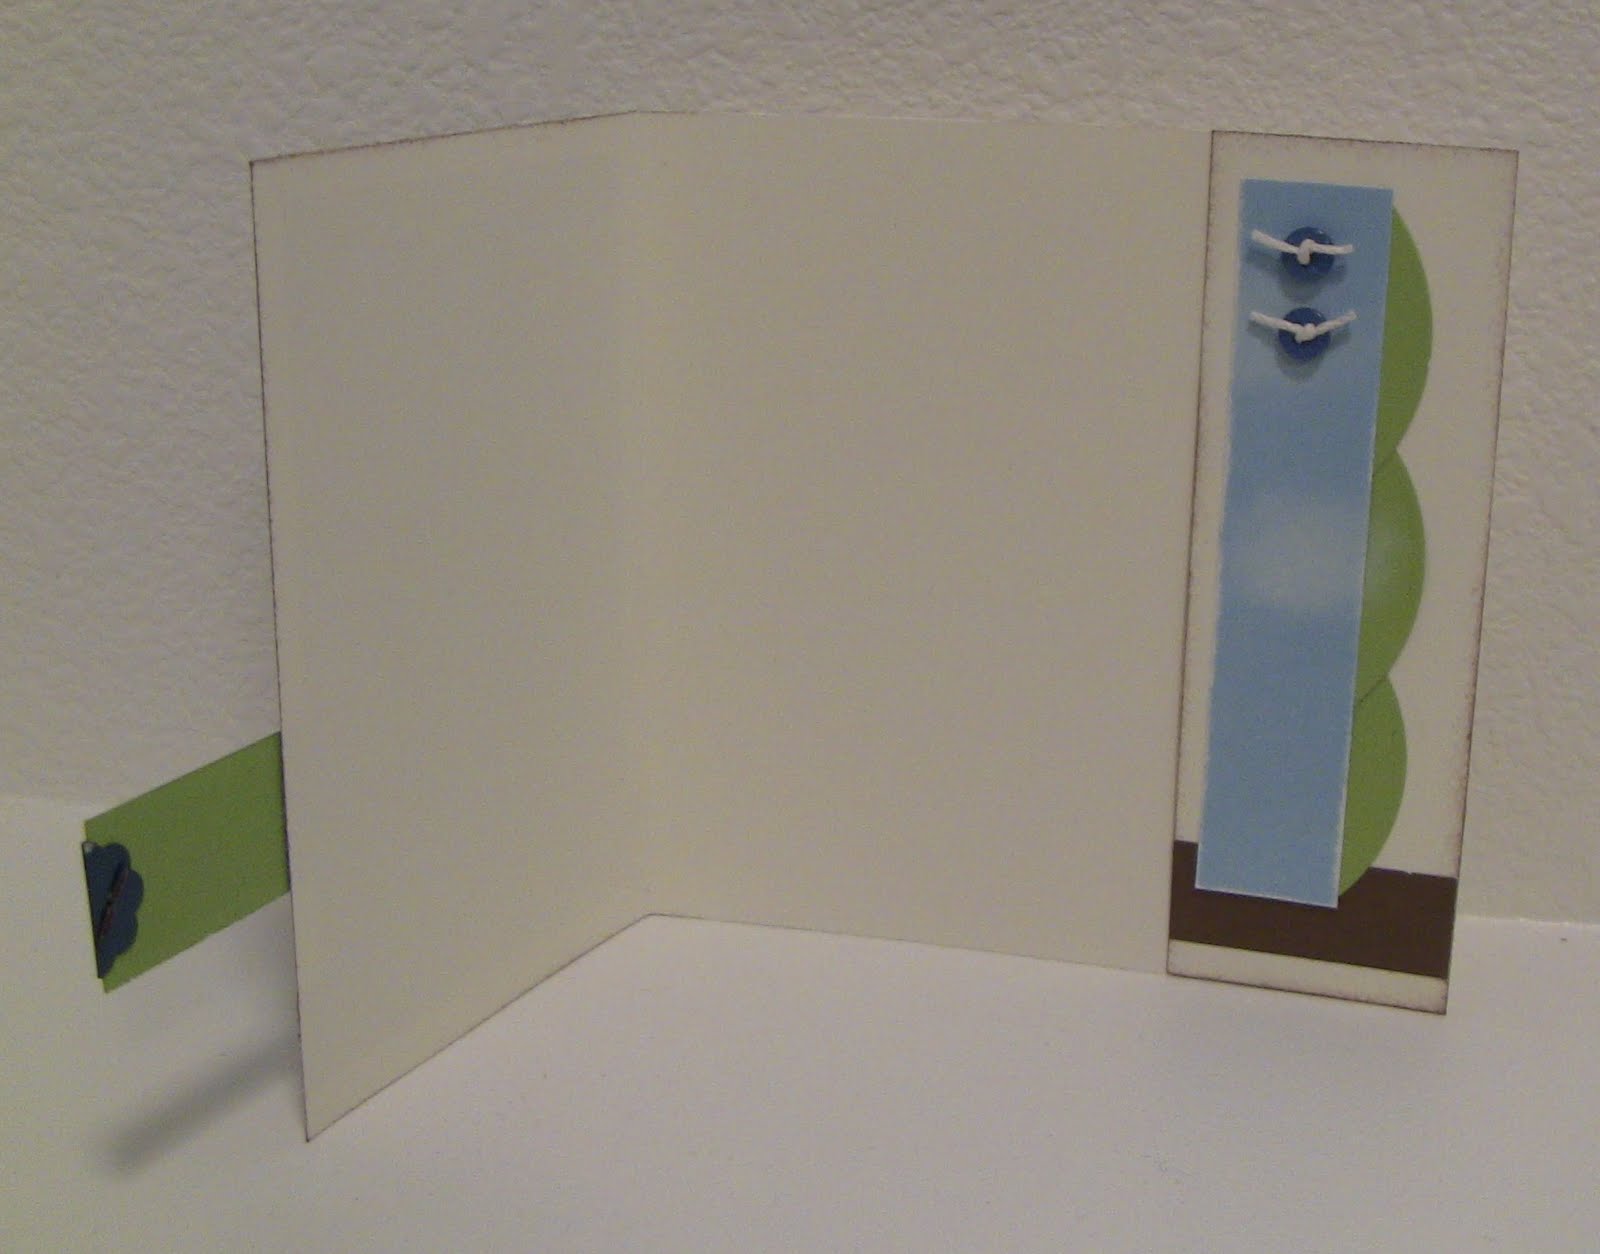
For this card I wanted a full summery green tree with blue skies in the background. It's a split fold card with a pocket inside. Perfect for holding a Justice gift card for the lucky Birthday girl! The clouds were created by sponging some White Daisy ink on the sky blue card stock. The tire swing has a piece of hemp tied to it to give it more movement.


Check back next week to see how I used this same stamp on my March calendar page.

Wednesday, February 16, 2011

Springy Chipboard Flowers

A perfect card to post today. So bright and cheery on a gloomy, cloudy day! This was made for a good friend who was surprised by close friends yesterday to celebrate her. It combines some pinks, oranges, yellows and greens. Most of which are some of the newer summer colors. Can I just say that I love the irresistibles chipboard. They are so pretty and easy to use. Hope it brightens your day too!