Just a happy little card using the Oh So Happy papers and embellishments. I believe the rainbow was actually from the cut above page in the Crafting with Heart subscription. I did not want to incorporate it in the page as instructed, but did not want it to be forgotten! I repurposed it on a greeting card that will undoubtedly brighten someone's day!
Thanks for stopping by! I hope this card brightened your day!
Showing posts with label rainbow. Show all posts
Wednesday, April 17, 2019
Friday, September 7, 2018
September Celebrations!
I told you earlier this week about the September special to celebrate National Stamping Month. I even made a video so that you can see how the Cut Above kits come packaged to you and how easily they can be created. You can find that video here.
This kit can be added to a 12x12 calendar or they can simply be a scrapbook layout. I even showed you how some pages coordinate well with one another and can be combined to form a two-page layout. Each page assembled as shown in the workshop guide can literally be assembled in under 15 minutes.
For some of you the pages may not have as much dimension or stamping as you wish and you can always embellish more as you see fit. For myself I found that one page in particular just was not appealing to me. I did not care for the background of the base page,so I found an easy fix and made it work for another picture....another celebration!
September is when my husband and I celebrate our wedding anniversary and this page would work wonderfully for the "Together" title. I pulled out some older whimsy fundamentals paper that had the word love all over it and that made the rest of the colors and picture come together.
If you are thinking about ordering the Making Memories special in September, keep in mind that you have multiple possibilities for each of these pages and you can make changes however you like. Most of the work is done for you, yet you have the option to pull in your own creative choices.
You can see all of the ordering options online here. Don't let this incredible offer pass you by!
This kit can be added to a 12x12 calendar or they can simply be a scrapbook layout. I even showed you how some pages coordinate well with one another and can be combined to form a two-page layout. Each page assembled as shown in the workshop guide can literally be assembled in under 15 minutes.
For some of you the pages may not have as much dimension or stamping as you wish and you can always embellish more as you see fit. For myself I found that one page in particular just was not appealing to me. I did not care for the background of the base page,so I found an easy fix and made it work for another picture....another celebration!
September is when my husband and I celebrate our wedding anniversary and this page would work wonderfully for the "Together" title. I pulled out some older whimsy fundamentals paper that had the word love all over it and that made the rest of the colors and picture come together.
If you are thinking about ordering the Making Memories special in September, keep in mind that you have multiple possibilities for each of these pages and you can make changes however you like. Most of the work is done for you, yet you have the option to pull in your own creative choices.
You can see all of the ordering options online here. Don't let this incredible offer pass you by!
Wednesday, July 15, 2015
The Scrap Room Renovation Layout
I have been working in my newly renovated scrapbooking room for a couple of weeks now. I'm adjusting to the various changes, but can say that I really love having everything organized again. The wood floors make me so happy every time I walk into the room and I'm very conscious about caring for them. A great way to remember all the hard work that went into renovating this room (and keeping it nice) was to create a layout about the transformation!
I held nothing back in creating this layout. I made it a true reflection of what this space means to me and feels like. The colors and embellishments in the layout represent my new room. I used lots of bits and pieces that I rediscovered through the clean up process.
When looking at the layout as a whole, your eye moves from left to right, starting with a before picture and moving through to the after photo. It also flows in a rainbow color scheme with pops of black & white, as do several areas of my scrapbook room. {ribbon, storage bins, Heidi Swapp color shine bottles, markers & inks}
I used one of the Heidi Swapp color shine templates, not as a template to spray mist, but literally the template! I added a color shine heart misted with sweet cherry and attached some ancient Basic Grey ribbons. A little FABulous stamped in black at the top from CTMH Happiness Lives Here, Design Decor Framed Art stamp set.
New and old patterned paper banners with some fun Washi tape.
More Washi tape used as labels and embellishments galore.
A cluster of stamps from an Operation Smile stamp set and Documenting Moments. More bright colors with a pop of black!
Here I used a Jillibean Soup "hello" photo frame, Heidi Swapp color shine "love" heart and a mix of papers and embellishments.
And finally, a Heidi Swapp color shine label card misted in teal and mint green with the date stamped in black. A zip strip with a great message and a few more buttons and twine finish this page.
I held nothing back in creating this layout. I made it a true reflection of what this space means to me and feels like. The colors and embellishments in the layout represent my new room. I used lots of bits and pieces that I rediscovered through the clean up process.
When looking at the layout as a whole, your eye moves from left to right, starting with a before picture and moving through to the after photo. It also flows in a rainbow color scheme with pops of black & white, as do several areas of my scrapbook room. {ribbon, storage bins, Heidi Swapp color shine bottles, markers & inks}
![]() |
| {left page} |
![]() |
| {right page} |
I used one of the Heidi Swapp color shine templates, not as a template to spray mist, but literally the template! I added a color shine heart misted with sweet cherry and attached some ancient Basic Grey ribbons. A little FABulous stamped in black at the top from CTMH Happiness Lives Here, Design Decor Framed Art stamp set.
New and old patterned paper banners with some fun Washi tape.
More Washi tape used as labels and embellishments galore.
A cluster of stamps from an Operation Smile stamp set and Documenting Moments. More bright colors with a pop of black!
Here I used a Jillibean Soup "hello" photo frame, Heidi Swapp color shine "love" heart and a mix of papers and embellishments.
And finally, a Heidi Swapp color shine label card misted in teal and mint green with the date stamped in black. A zip strip with a great message and a few more buttons and twine finish this page.
Now I will always remember the love and hard work that went into creating the space,
where I CREATE!
Saturday, October 6, 2012
Make a Card Today!
Hey Bloggers! Today is World Card Making Day! There are several blogs out there today celebrating too, inspiration is everywhere! I did a little research yesterday to figure out which cards are the most popular greeting cards. Birthday cards were number one, followed by Christmas. None of the sites I researched really gave the third most popular. Mostly they indicated that major Holidays such as Halloween, Valentine's Day, Mother's Day and Father's Day were all close runner up's.
So to celebrate today I created all brand new cards for Birthday, Christmas and a general everyday greeting card that I felt showcased a very hot trend in card making this year!
My first card is a Birthday card. Birthday's can't be sweeter than some colorful ice cream. Here I used the Fanfare stamp set and a fun shape cut on the Artiste cartridge.
For this Christmas card I steered away from the traditional colors and pulled in some beautiful blue papers from the Avonlea papers. I used the Perfect-Fit Holidays stamp set and added some bling to my snowflakes.
Finally, my everyday greeting card. Who doesn't love the surprise of happy mail!! I loved the trend of rainbow colors in artwork this year and those who know me best saw it in many of my projects! and of course I had to throw in a little bicycle {heart them}!!
I hope you get some time to make a card or two today. Better yet, send it to someone you love and let them know you care! Happy Day Everybody!
Friday, June 22, 2012
Soaking in the Sun
Today I am playing along with two challenges. The first challenge is a new Blog I have been visiting. I have wanted to play along from the beginning, but was unable to squeeze in some creative time. It is the new Close To My Heart Color My Heart ~ Color Dare Blog. This is their 5th challenge and the dare is one of my favorites! Create-your-own Rainbow based
on the color
wheel!
The other challenge is for Inspired By Blog that had this great photo inspiration this week.
The page I created for these two challenges is from a recent vacation to the beach. I was able to brighten the photo with the surrounding rainbow colors and the pattern is from the inspiration photo. What appears to be a fairly simple layout was actually quite time consuming, but I {heart} the result!
Labels:
color dare,
color inspired,
inspired by,
layout,
rainbow,
scrapbooking
Saturday, March 17, 2012
Butterfly Birthday Layout
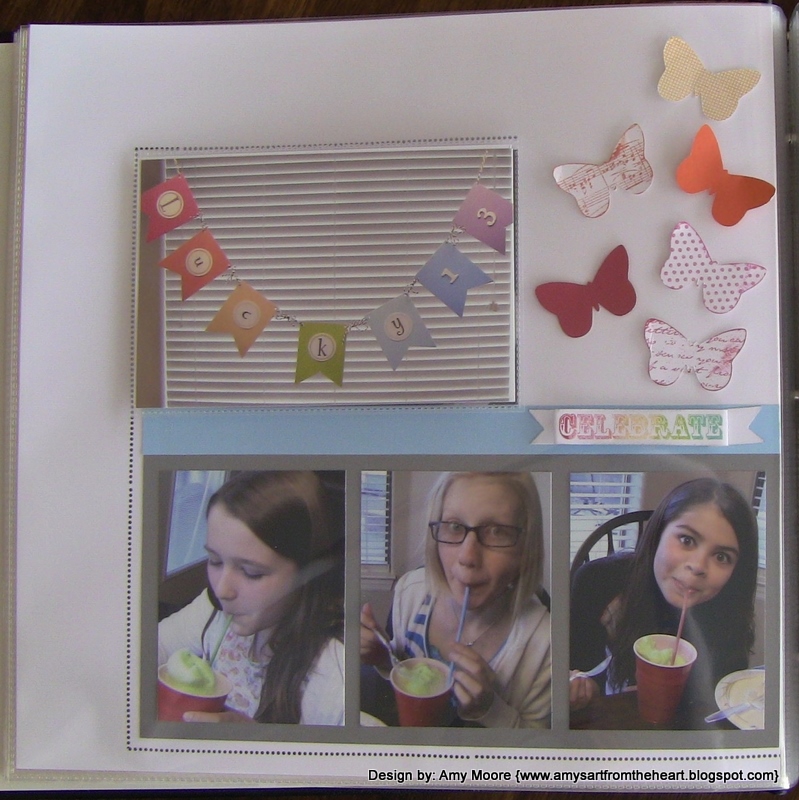
Keeping with the theme of this week, I wanted to share with you the layout I did for my daughter's Birthday pictures. I added in some leftover butterflies and stamped some new ones with various background stamps. Please excuse the glare from the page protectors. The reason they are photographed this way was for the flip flap and some of the butterflies are attached as a 3D feature outside of the protector.
Left side~
Left side with flip flap open~
Right side~
Close-up of the butterflies~
Left side~
Left side with flip flap open~
Close-up of the butterflies~
Labels:
birthday layout,
butterfly,
layout,
rainbow,
scrapbooking
Wednesday, March 14, 2012
Rainbow Butterfly Art
I have been seeing lots of art with butterflies lately. There has also been a growing trend of rainbows. As a gift to my daughter, I wanted to create a piece of artwork for her bedroom that would reflect her lively and colorful personality! This is what I came up with~
All of the butterflies were cut using the CTMH Art Philosophy Cricut Cartridge. This project was easy to create and allows you to use up those scraps of cardstock. I found my frame at Walmart which had some depth {similar to a shadow box} allowing the butterfly wings to "flutter"!
Here is Birthday girl with her new colorful artwork! She was super excited about it and cleared some wall space in her room right away to hang it!
All of the butterflies were cut using the CTMH Art Philosophy Cricut Cartridge. This project was easy to create and allows you to use up those scraps of cardstock. I found my frame at Walmart which had some depth {similar to a shadow box} allowing the butterfly wings to "flutter"!
Here is Birthday girl with her new colorful artwork! She was super excited about it and cleared some wall space in her room right away to hang it!
Labels:
art philosophy,
birthday,
butterly,
cricut,
framed art,
rainbow
Subscribe to:
Posts (Atom)