Hello friends!
Welcome to a new month and new specials! June has some great specials to continue your scrapbooking, gift giving and all things summer!
First, I would like to say that I just started my summer with a quick trip to sunny Southern California to see our son and spend time as family. I am just embarking on my summer adventures which will hopefully include more crafting time with all the new products.
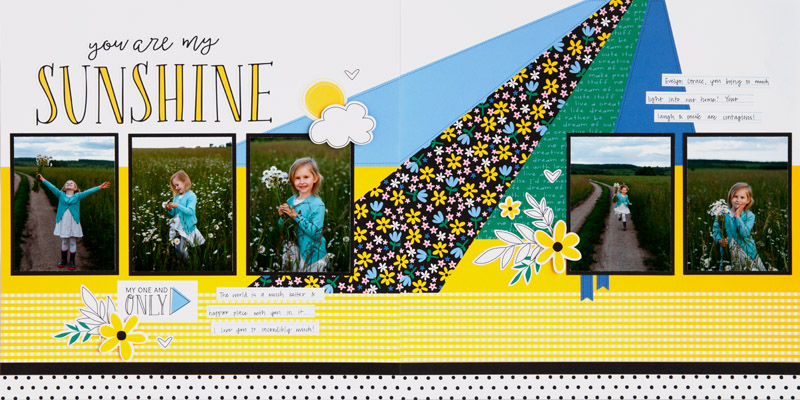
One of the new items I've been wanting to play with is the scrapbooking pages from the current Craft With Heart Subscription Box. I really liked the layout for the month of August which features the Craft On papers. I however, was not thrilled with the floral papers and wanted a burst of color to match the pictures I took in California! So I thought out of the box and pulled in some older Prickly Pear papers. The perfect match!
Here is what the original layout looks like in the Cut Above guide~
Big difference it makes! It was easy to change up though, I only needed to add some papers to the existing base and change up the embellishments. The "sunshine" title remained and I added the "California" from the Hello USA Cricut cartridge.
Here is a look at the layout with photo's~
I feel like the Cut Above kits gives you a good launch board towards creativity, yet allows you freedom to put your own flare on it!
Speaking of getting a head start towards creativity! Check out the special for this month.
FREE Layout Kits with Select Stamp Sets!
Celebrate the best moments during June with four My Acrylix® stamp sets and coordinating layout kits designed to preserve some of your favorite memories. This special features three stamp sets from our Seasonal Expressions idea book and one exclusive set—Then & Now—designed just for this special.
For this month only, we’ve paired each of these stamp sets with materials for creating a 2-page scrapbooking layout at no additional cost! You pay the price of the stamp set and get the layout materials FREE—a savings of up to 40%!
Save an additional 25% by purchasing all four kits as part of the special The Best Moments Are Free bundle! You can also get one of these workshop kits FREE when you become a Consultant or host a qualifying party in June!
Take a look at some of the kits you can purchase online or get the bundle!
Please log onto my website for more details and to see all the purchasing options!
Let's not forget about Dad's and Grad's this month either! We have a special mini album that is geared for Dad's, but would make a great graduation gift also with a few changes!
You can find all the details included for this promotion also on my website here. The bundle is the best deal and will make your project super easy to put together in time for Dad!
Last, but not least, a super pretty Stamp of the Month. It's Your Day to Sparkle is the sweetest cake stamp great for wedding, anniversaries and birthdays.
As always you can get this special stamp at a discounted price for the month of June only. Follow the hashtag #ctmhitsyoudaytosparkle or search for it on Pinterest for more ideas using this lovely stamp.
Thank you for stopping by, hope you have lots of crafty fun this summer!