One of the cutest new stamp sets in the Holiday Expressions Idea Book has to be Hedge-hugs found on page 94. The artwork shown on this page using the stamp set features one of the shaker windows on a "thank you" card. It's so adorable! Here are a few more ideas using this little cutie!
I've used papers from the Grateful Heart collection and the Seasons Mix-in collection for these cards. I wasn't kidding that this hedge hog is adorable! Check out the artwork in the Idea Book too!
Showing posts with label thank you card. Show all posts
Wednesday, October 10, 2018
Wednesday, June 20, 2018
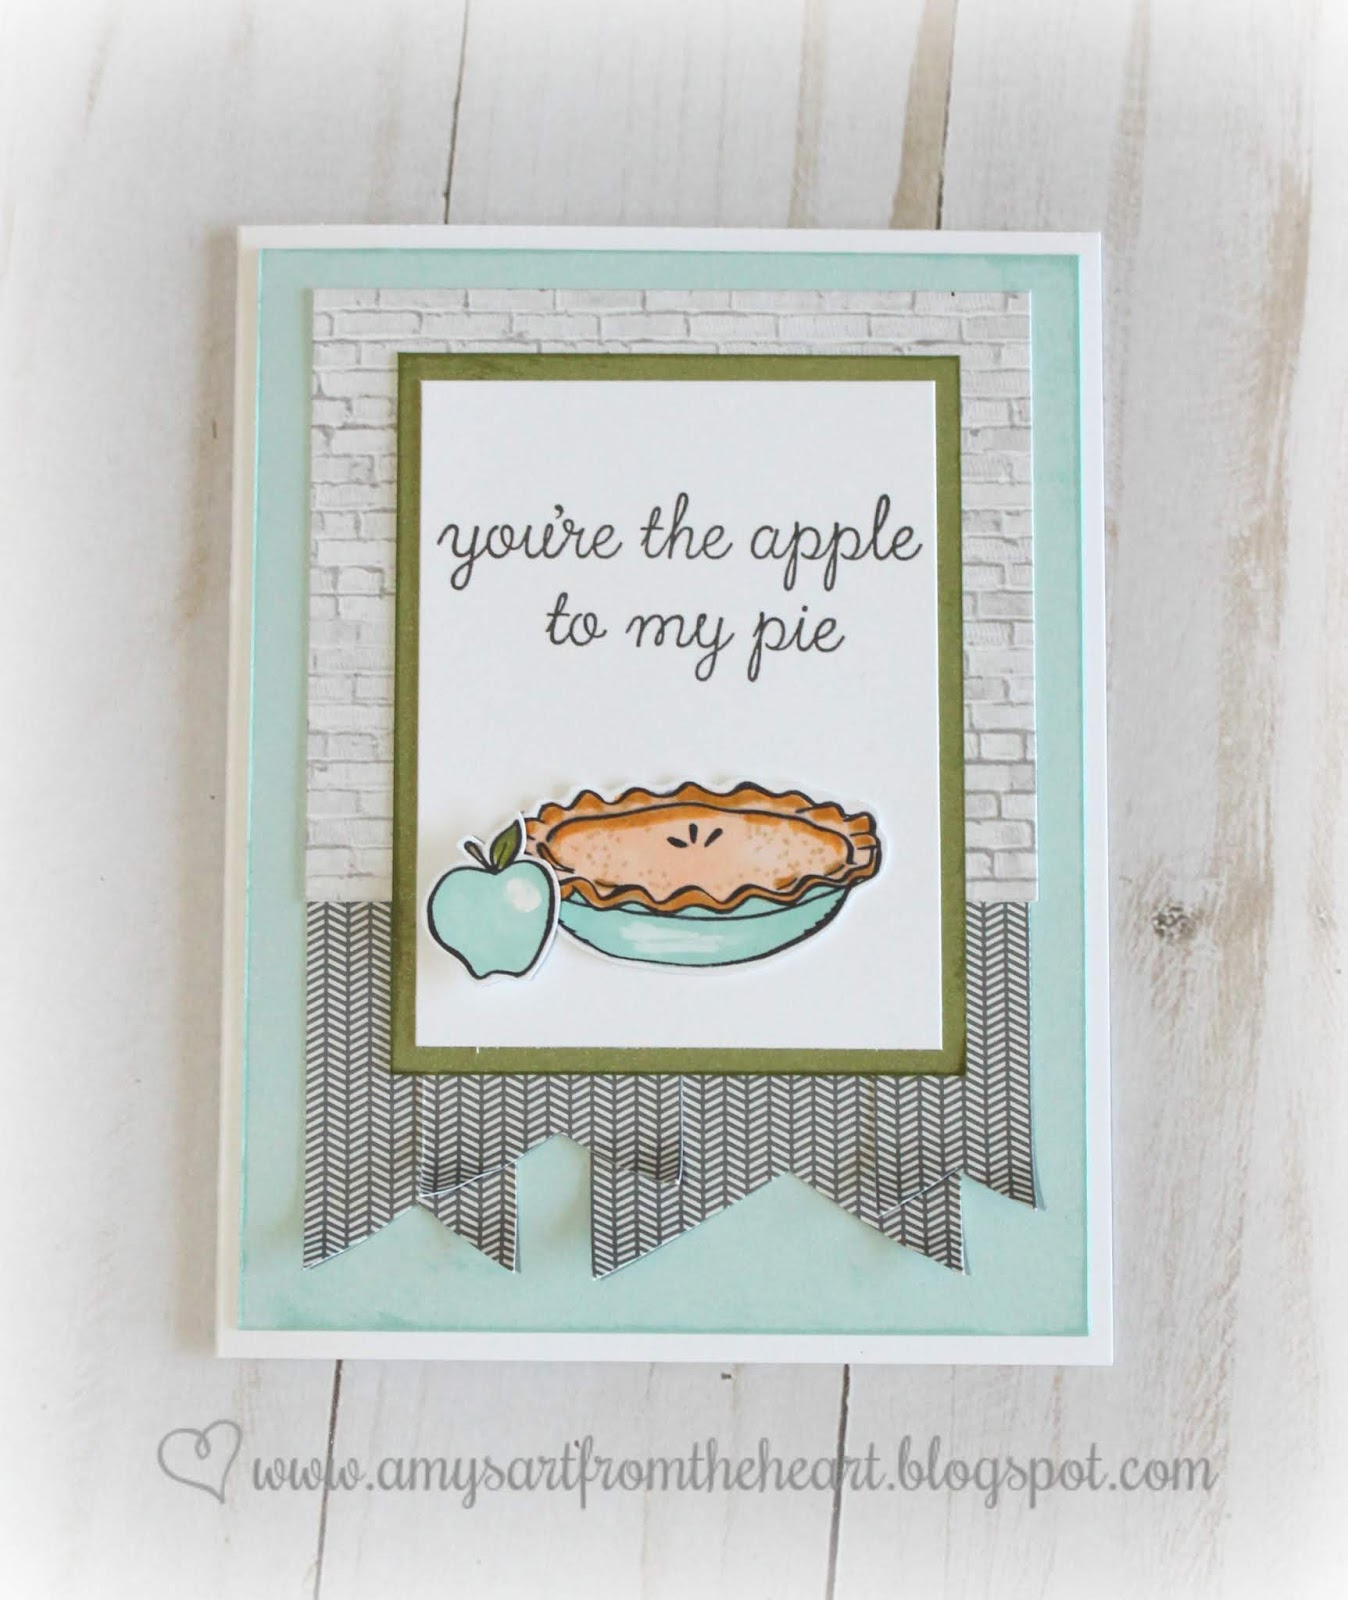
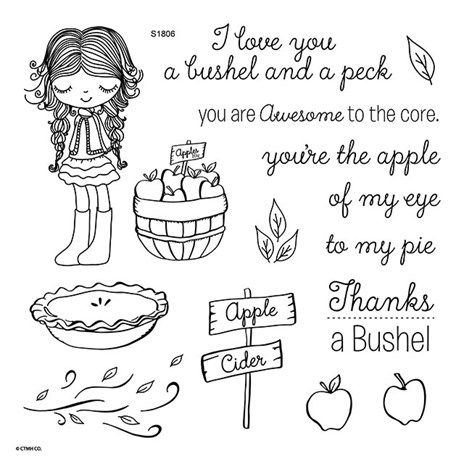
Bushel and a Peck
Did you get the stamp of the month for June yet? Oh, she is a cutie and the pie is delicious! You will have so much fun using the images from this set and will find the perfect sentiment as well. Take a look at all the different uses I've found.
I mixed all sorts of the new papers with just a little bit of some old papers with cardstock. I found that the images looked wonderful using both alcohol markers and a waterbrush pen with ink pad. You could also use watercolor pencils, whatever you wish to experiment with. {Just remember to stamp in archival or memento black ink so there will be no bleeding.}
I used some Beautiful Friendship paper for this one. I stayed a little stronger on the pink side of it.
How about a pop of light glacier blue with some brick pattern from the Documented collection! Cute!
Here are some more documented papers, but what's that? Did I sneak in a stamp for the August Stamp of the Month! {I love crafting}
This background paper looks like watercolor which I could have done myself, but the older Chelsea Gardens paper is already done for me. So soft and pretty with those vibrant green apples and leaves!
I love the pop of red on the subtle blue and green, plus that lacy ribbon gives it a vintage vibe.
{papers: Fresh Air, Documented & Postcard Perfect}
Here is the Beautiful Friendship paper again, but it really comes to life when popped with the canary yellow!
An old wood grain paper really makes these red apples pop, but all together it is a nice simple thank you card!
Lastly, when paired with the Fresh Air papers she is ready for Fall! I hope I remember to get this stamp out again when creating some autumn inspired cards. That means if you don't get it now, you won't have it at all for your fall projects either!
Shop online here. Be sure to check out all the specials being offered this month so that you can reach your total to get this stamp set for only $5.
I mixed all sorts of the new papers with just a little bit of some old papers with cardstock. I found that the images looked wonderful using both alcohol markers and a waterbrush pen with ink pad. You could also use watercolor pencils, whatever you wish to experiment with. {Just remember to stamp in archival or memento black ink so there will be no bleeding.}
I used some Beautiful Friendship paper for this one. I stayed a little stronger on the pink side of it.
How about a pop of light glacier blue with some brick pattern from the Documented collection! Cute!
Here are some more documented papers, but what's that? Did I sneak in a stamp for the August Stamp of the Month! {I love crafting}
This background paper looks like watercolor which I could have done myself, but the older Chelsea Gardens paper is already done for me. So soft and pretty with those vibrant green apples and leaves!
I love the pop of red on the subtle blue and green, plus that lacy ribbon gives it a vintage vibe.
{papers: Fresh Air, Documented & Postcard Perfect}
Here is the Beautiful Friendship paper again, but it really comes to life when popped with the canary yellow!
An old wood grain paper really makes these red apples pop, but all together it is a nice simple thank you card!
Lastly, when paired with the Fresh Air papers she is ready for Fall! I hope I remember to get this stamp out again when creating some autumn inspired cards. That means if you don't get it now, you won't have it at all for your fall projects either!
Shop online here. Be sure to check out all the specials being offered this month so that you can reach your total to get this stamp set for only $5.
Friday, August 5, 2016
Flowers in a Boot
Hello! I have a sweet card to share with you today! I held an Open House this morning to celebrate the new 2016-17 Annual Inspirations Idea Book. We looked at some fabulous new products and flipped through the pages of inspiration. Then we really had some fun by playing with a few of the new items. My card design was inspired by the Freshly Made Sketches this week, however the flowers and colors were inspired by some Sea Glass iced cupcakes and Ikea napkins! {what?}
Here is one of the cupcakes on a napkin, do you see my inspiration?
Here is the sketch on FMS~
Curious about the new products we got to work with? We had fun trying out some flower cuts from the newest Cricut cartridge Flower Market. They looked adorable in that Sea Glass rain boot also from the Flower Market cartridge. We used some older, almost retired Calypso paper and some new Rustic Home Fundamentals paper. For our sentiment we quickly and easily added a Thin Cuts thanks and simple stamped sentiment from one of the stamps included in the Cricut Flower Market collection.
Remember that you can get the Rustic Home collection for free with the Basically the Best promotion going on this month only. More details can be found in the Current Specials tab at the top.
Thanks for stopping by!
Here is one of the cupcakes on a napkin, do you see my inspiration?
Here is the sketch on FMS~
Curious about the new products we got to work with? We had fun trying out some flower cuts from the newest Cricut cartridge Flower Market. They looked adorable in that Sea Glass rain boot also from the Flower Market cartridge. We used some older, almost retired Calypso paper and some new Rustic Home Fundamentals paper. For our sentiment we quickly and easily added a Thin Cuts thanks and simple stamped sentiment from one of the stamps included in the Cricut Flower Market collection.
Remember that you can get the Rustic Home collection for free with the Basically the Best promotion going on this month only. More details can be found in the Current Specials tab at the top.
Thanks for stopping by!
Thursday, March 3, 2016
A Skull Onesie
What do you do when your attending a baby shower and the theme is gray, teal and skulls? You create a totally awesome baby shower card!
I knew that the Artfully Sent cartridge had a baby onesie swing card, it would just need a little tweaking. I used some chevron gray Geogie paper on the inside and backed it with some lagoon paper to meet the colors of the theme. Then I cut the onesie piece out of some red textured paper so it would stand out on the card. I used the skull image from the Cricut cartridge, but was really uncertain if it would cut so small and intricate. Luckily the Cricut Explore machine is the bomb and got the job done perfectly!
We gifted the soon to be parents a gift card for where they were registered. Placing the gift card inside of the card was not an option as the swing design does not really hold it securely. So instead I cut a chevron sleeve from the same cartridge and dressed it up with another onesie and a welcome baby sentiment. However, instead of another skull I placed the letter 'A' on the front because the babies name will begin with that letter.
I recently created another chevron sleeve card for school this week as we celebrate Dr. Seuss' Birthday! Be sure to follow me on Instagram so you don't miss fun projects like this one!
I knew that the Artfully Sent cartridge had a baby onesie swing card, it would just need a little tweaking. I used some chevron gray Geogie paper on the inside and backed it with some lagoon paper to meet the colors of the theme. Then I cut the onesie piece out of some red textured paper so it would stand out on the card. I used the skull image from the Cricut cartridge, but was really uncertain if it would cut so small and intricate. Luckily the Cricut Explore machine is the bomb and got the job done perfectly!
We gifted the soon to be parents a gift card for where they were registered. Placing the gift card inside of the card was not an option as the swing design does not really hold it securely. So instead I cut a chevron sleeve from the same cartridge and dressed it up with another onesie and a welcome baby sentiment. However, instead of another skull I placed the letter 'A' on the front because the babies name will begin with that letter.
I recently created another chevron sleeve card for school this week as we celebrate Dr. Seuss' Birthday! Be sure to follow me on Instagram so you don't miss fun projects like this one!
Labels:
artfully sent,
baby,
baby card,
baby shower,
Cat in the Hat,
chevron,
Dr. Seuss,
onesie,
skull,
sleeve card,
swing card,
thank you card
Wednesday, July 23, 2014
Sarita Card Workshop
One of my "go to" Close To My Heart products are the instructional how-to books. We have some for just scrapbooking, some for cards and the most recent books combines both of these. I opened the Wishes book the other day for some card ideas. {This is a book for just card making.} Browsing the pages I re-discovered some of the card workshops contained within the book. These are fantastic, because it gives you directions in cutting a few pieces of cardstock and only one design paper to create several cards! In this case 16 of them!
I chose to use the Sarita papers. It is such a lovely paper with cool patterns on both sides and vibrant colors. With this workshop you create 16 cards, however it is only 8 designs. As you can see I flipped my papers and chose all sorts of different sentiments and stamped images to make each and everyone unique! How many stamp sets did I use all together? Your guess is as good as mine! I was just having fun creating and in the end I had a pile of stamps on the floor next to my chair!! {ha ha}
Do you send several cards for Christmas? This workshop would be perfect for making a lot of cards in a minimal amount of time using just a little bit of supply!
I chose to use the Sarita papers. It is such a lovely paper with cool patterns on both sides and vibrant colors. With this workshop you create 16 cards, however it is only 8 designs. As you can see I flipped my papers and chose all sorts of different sentiments and stamped images to make each and everyone unique! How many stamp sets did I use all together? Your guess is as good as mine! I was just having fun creating and in the end I had a pile of stamps on the floor next to my chair!! {ha ha}
Do you send several cards for Christmas? This workshop would be perfect for making a lot of cards in a minimal amount of time using just a little bit of supply!
Labels:
birthday card,
card workshop,
feathers,
flowers,
sarita,
thank you card,
wishes how to book
Saturday, June 21, 2014
A Mojo Thank You
I found another sketch that intrigued me this week. I have not played along with Mojo Monday in some time and I'm still in need of some Thank You cards!
Labels:
card sketch challenge,
mojo monday,
thank you card
Wednesday, June 19, 2013
Inspired By Pattern
This card was inspired by the photo on the Inspired By Blog! It contains no background papers at all and might be considered almost a one layer card. I've created a pattern similar to the photo using all stamps; images and sentiments! I chose some fun patterns and lively, cheerful colors.
{Inspiration Photo}
Instead of using a dotted line to separate the sections, I lightly embossed squares. Unfortunately it is very difficult to see with the white photo?! It's still a very cool concept for a card or invitation. I might play around some more and see what I come up with!!Tuesday, June 18, 2013
Thanks! {with green and a pop of bling}
I combined two challenges today for a fun, graphic "Thank You" card!
The pop of Pear green with black and white is so stunning! That was the color combination this week on Dynamic Duos! I chose some chevron paper from the For Always kit. The little Thank You sentiment is from a special stamp being offered for a limited time to help provide relief to the Oklahoma victims. You can get the details under the Current Specials tab!
I splashed just a little chartreuse Color Shine {Heidi Swapp} on the base of the card giving it a bit of shimmer. I then added some green bubbles and black sparkles for some "bling". I hope it was enough for the challenge on The Paper Players , Bring on the Bling!
The pop of Pear green with black and white is so stunning! That was the color combination this week on Dynamic Duos! I chose some chevron paper from the For Always kit. The little Thank You sentiment is from a special stamp being offered for a limited time to help provide relief to the Oklahoma victims. You can get the details under the Current Specials tab!
I splashed just a little chartreuse Color Shine {Heidi Swapp} on the base of the card giving it a bit of shimmer. I then added some green bubbles and black sparkles for some "bling". I hope it was enough for the challenge on The Paper Players , Bring on the Bling!
Labels:
bling,
chevron,
color shine,
color challenge,
for always,
thank you card
Saturday, May 4, 2013
Every Mile a Memory ~ Thanks
Another thank you card for you today using the sketch this time at Freshly Made Sketches! This time I've combined the graphic black & white chevron from the For Always papers with just a bit of Dream Pop shimmer cardstock. You may think this is such a strange "thank you" card, but it was for my son's recent Birthday in which he received some gas money!
Friday, May 3, 2013
You're the Best~Thanks
Using the sketch at The Paper Players this week I created this fun Thank You card. I flipped the sketch to fit the award ribbon image I wanted to use. The ribbon tails are created with some of the fabulous Dream Pop shimmer cardstocks.
I have tried to capture the shimmer in these cardstock sheets. Each color comes with a different pattern like dots, chevron, wood grain, etc. When the light shines on them you can see these patterns shimmer with an embossed finish. They are really cool!
Contact me to get your Dream Pop collection or order online here.
I have tried to capture the shimmer in these cardstock sheets. Each color comes with a different pattern like dots, chevron, wood grain, etc. When the light shines on them you can see these patterns shimmer with an embossed finish. They are really cool!
Contact me to get your Dream Pop collection or order online here.
Subscribe to:
Posts (Atom)