I love the month of September! Perhaps because it is my wedding anniversary month, my birthday month, cooler weather....or maybe because it is time for all NEW Idea Books, products and time to celebrate National Stamping Month!
Close to My Heart is offering a ton of great new products and programs. Please check out the right side bar for links to the new books, subscription programs, specials and new Cricut link.
I will be back soon to show off some of the new goodies and classes I'm working on including the upcoming Share the Seasons Christmas card class I'm hosting at the end of this week.
Here is a sneak peek of some of the items and artwork~
Come back and visit soon for more inspiration!
Showing posts with label christmas cards. Show all posts
Monday, September 2, 2019
Tuesday, July 9, 2019
Christmas in July
I will be hosting a Christmas in July card workshop later this week. I wanted to share the cards and tell you about some of the products that I am using as they are only available this month!
Here is the assortment of cards that we will be creating~
You might be wondering how can you do a Christmas themed card workshop when there is not a Holiday Idea Book with Christmas papers yet? Thinking out of the Christmas box you will discover that the Into the Woods papers are great for Christmas or Winter themed cards. Add in some stamped images, Cricut cuts and Thin cuts and you have wonderful holiday themed cards!
Two stamp sets I used are actually found in card making workshops in the current catalog. Those are the You're Awesome kit and the Thinking of You kit. These stamps are sold only in the card making kits with all the materials you need to design 12 handmade cards. Why not make a beautiful set of cards with the kit and then find more uses for the stamp set later!
I have also used the July Stamp of the Month named appropriately, Bear Hugs! You can get this stamp for only $5 with a qualifying purchase this month only. Bear and cub are perfect for a Christmas card!
Finally, you may also notice the Falala card with punched out circles. This is a band new Thin Cut only available through a promotion called Share the Joy! You can get more details on this special going on throughout the month of July on my website. The cool part is you have the option to purchase the thin cuts only, stamps only, or the complete bundle of products at a discount.
As you can see I have incorporated the monthly specials with current/available products to create unique Christmas cards. Sleigh bells will be ringing soon, will you be ready?!
Tuesday, October 23, 2018
Christmas Blessings
Sending Christmas Blessings
We are rapidly approaching the most wonderful time of the year, and we know how crafters like to plan ahead. That's why Close To My Heart has posted the new Christmas Blessings card workshop, featuring an exclusive My Acrylix® stamp set designed especially for the Christmas season. Create the set of 12 cards shown above using the materials in the discounted Christmas Blessings bundle plus a few additional supplies.
Get more details online here.
Friday, September 21, 2018
Tidings of Comfort and Joy
Here is another look at that cute Stamp of the Month! This time I've used the "tidings of comfort and joy" sentiment of the Just Treats stamp set. It looks great with the Oh What Fun papers and sweet little birdie complements.
I hope that you have found some inspiration for this Stamp of the Month. It will no longer be available after September so don't delay on getting this awesome stamp set!
Thursday, September 20, 2018
Warm Winter Wishes
Today I'm sharing a couple of cards that use the "warm winter wishes" sentiment found on the Just Treats Stamp of the Month. Both cards feature the darling little coffee/cocoa cup.
This first card uses the Seasons Mix-in paper with a cozy color combination of blue and pink, but is anchored down by a bold black and white polka dot.
This next card screams cozy Christmas wishes with the gorgeous 'Tis the Season papers and a pinecone stamp.
Did you know that you can search out more ideas using the stamp of the month on Pinterest and Instagram? Use #ctmhstampofthemonth, #ctmhsotm, or #ctmhjusttreats.
This first card uses the Seasons Mix-in paper with a cozy color combination of blue and pink, but is anchored down by a bold black and white polka dot.
This next card screams cozy Christmas wishes with the gorgeous 'Tis the Season papers and a pinecone stamp.
Did you know that you can search out more ideas using the stamp of the month on Pinterest and Instagram? Use #ctmhstampofthemonth, #ctmhsotm, or #ctmhjusttreats.
Wednesday, November 22, 2017
Holiday Card Buffet Continued
I shared with you some of the cards from my annual Holiday Card Buffet. Those were the cards that offered a raffle prize. Here are some of the other cards that guests got to create~
As you can see I had just a couple of Fall/Thanksgiving themed cards. These used the gorgeous Falling For You papers, some new stamp sets and watercolors that allowed the participants a few moments of relaxing coloring!
As you can see, I always try to provide a mix of colors and themes. This was a really fun buffet!
As you can see I had just a couple of Fall/Thanksgiving themed cards. These used the gorgeous Falling For You papers, some new stamp sets and watercolors that allowed the participants a few moments of relaxing coloring!
As you can see, I always try to provide a mix of colors and themes. This was a really fun buffet!
Saturday, December 10, 2016
Christmas Card Buffet
I recently hosted my first ever card buffet. I created a dozen different Christmas cards with a huge variety of themes from reindeer to gingerbread men and even a VW bug!? The ladies had 2 hours to create and the more they made the more savings the earned per card. It was hit overall and everyone really had fun!
Here is a picture of the cards, minus one that was left out of the photo.~
This picture illustrates how the cards were set in crates or boxes with kits to make the card along with the materials needed to complete it. Most required a stamp set and inks, but others needed thin cuts, markers, craft heaters, embossing folders and more.
Here are the ladies having fun, but mostly getting to work....serious business you know!
One of the aspects that the ladies enjoyed the most is that all the ideas were already thought of for them. The could simply look at the master card and recreate it. I try to come up with interesting ideas and wanted to explore all sorts of stamp images as well as use a variety of papers. Sometimes the ideas came from strange items. Like the Merry VW bug card. On a recent shopping trip to Michaels I came across these adorable magnetic closing boxes for 50% off. The image of the little cars decked out for the holidays was my inspiration for this card. I think the post office should seriously make this a stamp design. I would buy it! None of these card kits were left in the box...well not many cards were left at all at the end of the night!
Happy crafting!
Here is a picture of the cards, minus one that was left out of the photo.~
This picture illustrates how the cards were set in crates or boxes with kits to make the card along with the materials needed to complete it. Most required a stamp set and inks, but others needed thin cuts, markers, craft heaters, embossing folders and more.
Here are the ladies having fun, but mostly getting to work....serious business you know!
One of the aspects that the ladies enjoyed the most is that all the ideas were already thought of for them. The could simply look at the master card and recreate it. I try to come up with interesting ideas and wanted to explore all sorts of stamp images as well as use a variety of papers. Sometimes the ideas came from strange items. Like the Merry VW bug card. On a recent shopping trip to Michaels I came across these adorable magnetic closing boxes for 50% off. The image of the little cars decked out for the holidays was my inspiration for this card. I think the post office should seriously make this a stamp design. I would buy it! None of these card kits were left in the box...well not many cards were left at all at the end of the night!
Happy crafting!
Wednesday, November 25, 2015
Christmas Cards with Fundamentals
How very Merry are these Christmas cards I created using some Fundamental papers! In person they have a fantastic shimmer in an eye catching design. I mixed them with some patterned papers, fresh new stamps and some embellishments from the Fundamental Assortments.
You have until November 30th to take advantage of this month's Simply Fundamental Scrapbooking bundle and receive a pack of memory protectors free!
Labels:
assortment,
christmas cards,
fundamental papers,
tree,
white pines
Thursday, December 18, 2014
Christmas Card Display
During my Holiday Open house I had lots of cards on display. Some of the cards used some newer stamp sets and products, however many of the cards were made using the newest Cricut collection Artfully Sent. I think the ladies were inspired and got a few ideas!
Here I showed a simple bottom border card {Ho Ho Ho}, the new adorable scooter card with some gold bling and washi tape, a gorgeous deer card and peeking in the left corner a nativity scene card.
On this display I had a couple swing cards and I also turned some PML type cards into full size Holiday cards!
Here is a close up of just a few of the cards.
This cheerful deer card is one of about 20 or so?! This was the card I designed and sent to family & friends for Christmas. The deer comes from one of the images intended to be used in a Holiday pop up card. The antlers cut beautifully even though they were so delicate and those birds were so tiny! I used some older cream paper, but down the center of the card is the gorgeous paper from the new Heartstrings collection. A tiny holiday cheer sentiment and some grosgrain ribbon finished the card perfectly. Oh! Don't forget the red glitter for the bird!
I love how this nativity scene card turned out. It was actually suppose to be cut larger, but it still came together perfectly. I kept it simple with neutral colors and a message stamped inside.
This noel card is intended to be used like a PML {Picture My Life} card for your scrapbooking pockets. However, with some layering, a velvet poinsettia and some sparkles, it becomes a traditional 5x7 greeting card.
Finally, some swing cards. These can be created fairly quickly and can be left simple or dressed up as you wish. I can't decide which one I like better...the adorable snowman or the ornamental tree?!
I hope you found some inspiration here today and will try some of these ideas for your own Christmas cards!
Here I showed a simple bottom border card {Ho Ho Ho}, the new adorable scooter card with some gold bling and washi tape, a gorgeous deer card and peeking in the left corner a nativity scene card.
Hey look! There's that Holiday Happenings Kraft mini book that I posted earlier!
On this display I had a couple swing cards and I also turned some PML type cards into full size Holiday cards!
Here is a close up of just a few of the cards.
This cheerful deer card is one of about 20 or so?! This was the card I designed and sent to family & friends for Christmas. The deer comes from one of the images intended to be used in a Holiday pop up card. The antlers cut beautifully even though they were so delicate and those birds were so tiny! I used some older cream paper, but down the center of the card is the gorgeous paper from the new Heartstrings collection. A tiny holiday cheer sentiment and some grosgrain ribbon finished the card perfectly. Oh! Don't forget the red glitter for the bird!
I love how this nativity scene card turned out. It was actually suppose to be cut larger, but it still came together perfectly. I kept it simple with neutral colors and a message stamped inside.
This noel card is intended to be used like a PML {Picture My Life} card for your scrapbooking pockets. However, with some layering, a velvet poinsettia and some sparkles, it becomes a traditional 5x7 greeting card.
Finally, some swing cards. These can be created fairly quickly and can be left simple or dressed up as you wish. I can't decide which one I like better...the adorable snowman or the ornamental tree?!
I hope you found some inspiration here today and will try some of these ideas for your own Christmas cards!
Labels:
artfully sent,
christmas cards,
cricut,
deer,
Mini Album,
nativity,
noel,
snowman,
tree
Friday, December 12, 2014
Make it Merry
I like to challenge myself to think outside of the Christmas box from time to time when creating my Christmas cards. Every once in awhile I come back to traditions though. The cards I am showing today are exactly that, traditional red and green! They are merry and a little bit bright with some shimmery fundamental papers!
Labels:
christmas cards,
cricut,
make it merry,
paper fundamentals
Monday, December 8, 2014
Yuletide Vintage Christmas Cards
While at my annual Christmas card exchange the ladies wanted to create some cards I had on display last month. I guided them through a few of the cards and encouraged them to try different paper and complement combinations. Not every card was exactly the same. We had lots of fun mixing other papers, vellum and embellishments into the cards. We also decided that the Yuletide papers and images on the complements gave the cards a beautiful vintage Christmas feel.
Labels:
christmas cards,
santa,
shimmer trim,
vellum,
Yuletide
Monday, December 9, 2013
The Big Event!! {Christmas card exchange 2013}
This may be a very lengthy post and I still might not be able to cover everything from this year's Christmas card exchange!
Every Christmas I hold a card exchange and event! This year I had 7 ladies participating in the card exchange. I had a mini album project, posted earlier, that was a big success! This year we also had a cookie swap. The ladies brought cookies and the recipe to share, it was delicious!
Where to start?? I'll save the best for last...the gorgeous artwork. So first up is a collage of the treats!
I decided that we would need something to drink with all the cookies. I set up a Hot Chocolate station. I made the hot chocolate in my crockpot so it was hot and ready and so easy to do! For the buffet of toppings and add-in's I had vanilla & peppermint marshmallows, crushed peppermints candies, Hershey kisses {milk chocolate and peppermint} and whipped cream. It was really yummy!
We had a fantastic variety of cookies; sugar, gingerbread, samoa truffles, dipped pretzels, almond cookies, butter cookies, low fat lemon and holiday snowballs. We sampled them all and took home recipes with us! Can you say sugar rush!!?
There were so many cute and creative ideas this year. Sparkle & Shine papers were popular, but then there were some great older papers used, some surprising color combinations, interactive cards, fun puffy applications and paints, lots of glitter, and some Washi tape too!
This first card is mine. I used the Candyland stamp set. I made a boy and girl gingerbread people and stamped a sweet sentiment. I chose a different color combination and added some glitter and Washi tape. The bow on the gingerbread girl was my favorite! It was cut at the tiniest measurement possible on the Artiste Cartridge! I folded it carefully and added a teeny tiny pearl in the center.
This next card is by Stacie. I love that she included some older but still loved Jingle papers. Plus I'm a sucker for birds! She used a unique puffy paint application around them as well as her hand stamped sentiment. So cute!
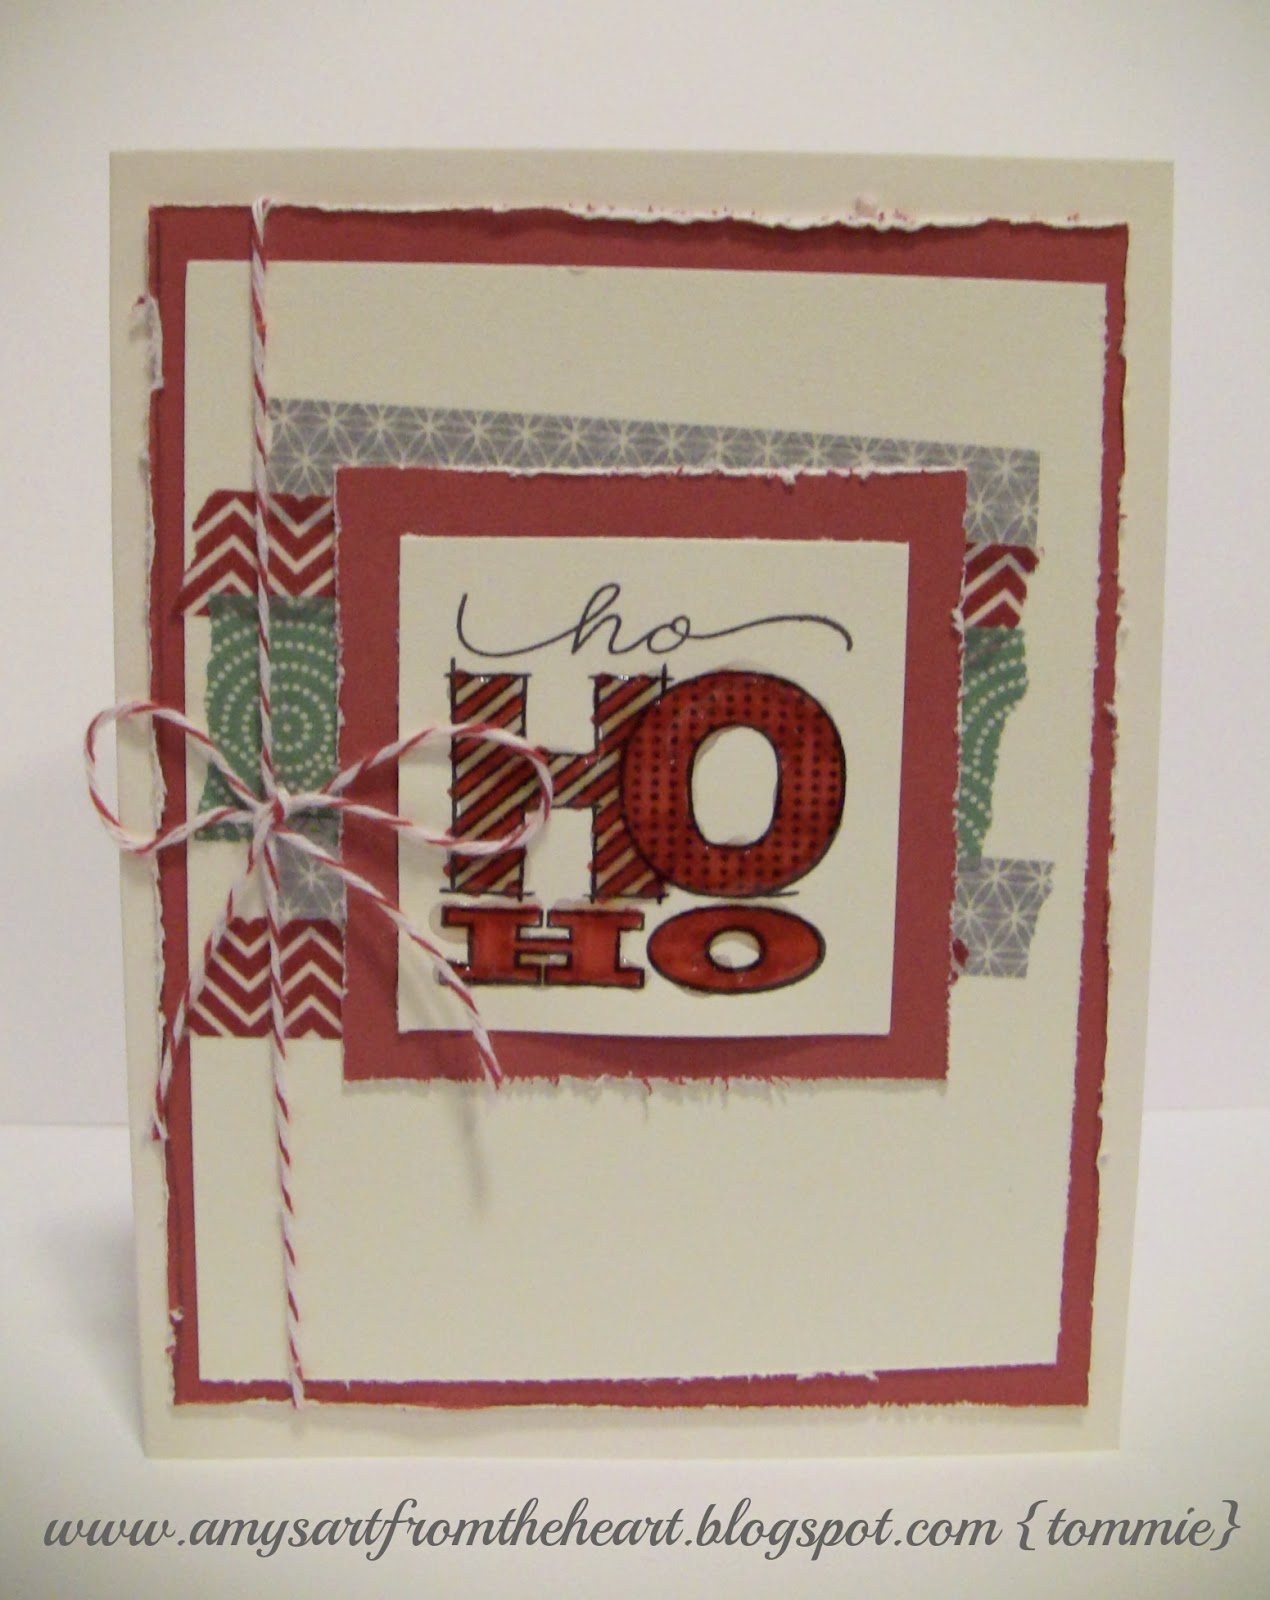
Tommie used the awesome new "m" sized stamp set for her sentiment and added some color and liquid glass to the letters. She also had lots of fun ripping her Washi tape creating a very unique background! Her card is a perfect example of what you can create on a limited budget.
A step card from Pat! This card easily turns into art when you prop it open on a shelf or table. She used the bling around her tree and star and again a little Christmas birdie...{heart that}!! The extra cuts and folds may be a little time consuming, but it is so worth it in the end, this card is darling!
Nanette's card is so warm and welcoming. I love her simple details and embellishments. A classic color combination truly makes it feel like Christmas!
Next up is Barbara's card. Her card is a stunning blue with just hints of sparkling silver. I love the window cut out for her sentiment and the silver bird is a gorgeous addition! The blue was truly a stand out among the rest!
Janet's card was a fabulous surprise! The front of her card is covered in my favorite design of the Sparkle and Shine papers. That fun red, white and silver stripe. Then she embellished with sparkly snow flakes and swirls of bling. But the fun did not stop there. We were pleasantly surprised to find a mobile of dangling snowflakes on the inside! How clever is that?!
This is my talented crew of ladies. Not pictured is a new gal that joined us for the fun and project. We will reel her into our group and eventually she may want to participate in our exchanges too!
Here is a picture of the gift bags I created for the ladies. I used the big Merry & Bright sentiment stamp from the Sparkle and Shine Workshop on the Go. I cut strips of the other matching paper and layered them into banner shapes below. Inside each bag the ladies found a little surprise from me.
I saw these ornaments at Walmart and thought they would be perfect for the left over curls from our paper wreaths we made last month. I added some snowflakes inside and tied them with some gray gingham ribbon. Just a small gift to say that I appreciate them and their loyalty to my little crafting business!
Wait! That's not all! I had one more little project to share. Come back soon to see a special project I shared with all the ladies when they were here!
Every Christmas I hold a card exchange and event! This year I had 7 ladies participating in the card exchange. I had a mini album project, posted earlier, that was a big success! This year we also had a cookie swap. The ladies brought cookies and the recipe to share, it was delicious!
Where to start?? I'll save the best for last...the gorgeous artwork. So first up is a collage of the treats!
I decided that we would need something to drink with all the cookies. I set up a Hot Chocolate station. I made the hot chocolate in my crockpot so it was hot and ready and so easy to do! For the buffet of toppings and add-in's I had vanilla & peppermint marshmallows, crushed peppermints candies, Hershey kisses {milk chocolate and peppermint} and whipped cream. It was really yummy!
We had a fantastic variety of cookies; sugar, gingerbread, samoa truffles, dipped pretzels, almond cookies, butter cookies, low fat lemon and holiday snowballs. We sampled them all and took home recipes with us! Can you say sugar rush!!?
Now on to the art! I made a little gift bag for each of the girls to take their cards home in. They were all set out on my table and the ladies placed their own cards in front of their bag to display them.
There were so many cute and creative ideas this year. Sparkle & Shine papers were popular, but then there were some great older papers used, some surprising color combinations, interactive cards, fun puffy applications and paints, lots of glitter, and some Washi tape too!
This first card is mine. I used the Candyland stamp set. I made a boy and girl gingerbread people and stamped a sweet sentiment. I chose a different color combination and added some glitter and Washi tape. The bow on the gingerbread girl was my favorite! It was cut at the tiniest measurement possible on the Artiste Cartridge! I folded it carefully and added a teeny tiny pearl in the center.
This next card is by Stacie. I love that she included some older but still loved Jingle papers. Plus I'm a sucker for birds! She used a unique puffy paint application around them as well as her hand stamped sentiment. So cute!
Tommie used the awesome new "m" sized stamp set for her sentiment and added some color and liquid glass to the letters. She also had lots of fun ripping her Washi tape creating a very unique background! Her card is a perfect example of what you can create on a limited budget.
A step card from Pat! This card easily turns into art when you prop it open on a shelf or table. She used the bling around her tree and star and again a little Christmas birdie...{heart that}!! The extra cuts and folds may be a little time consuming, but it is so worth it in the end, this card is darling!
Nanette's card is so warm and welcoming. I love her simple details and embellishments. A classic color combination truly makes it feel like Christmas!
Next up is Barbara's card. Her card is a stunning blue with just hints of sparkling silver. I love the window cut out for her sentiment and the silver bird is a gorgeous addition! The blue was truly a stand out among the rest!
Janet's card was a fabulous surprise! The front of her card is covered in my favorite design of the Sparkle and Shine papers. That fun red, white and silver stripe. Then she embellished with sparkly snow flakes and swirls of bling. But the fun did not stop there. We were pleasantly surprised to find a mobile of dangling snowflakes on the inside! How clever is that?!
This is my talented crew of ladies. Not pictured is a new gal that joined us for the fun and project. We will reel her into our group and eventually she may want to participate in our exchanges too!
Here is a picture of the gift bags I created for the ladies. I used the big Merry & Bright sentiment stamp from the Sparkle and Shine Workshop on the Go. I cut strips of the other matching paper and layered them into banner shapes below. Inside each bag the ladies found a little surprise from me.
I saw these ornaments at Walmart and thought they would be perfect for the left over curls from our paper wreaths we made last month. I added some snowflakes inside and tied them with some gray gingham ribbon. Just a small gift to say that I appreciate them and their loyalty to my little crafting business!
Wait! That's not all! I had one more little project to share. Come back soon to see a special project I shared with all the ladies when they were here!
Subscribe to:
Posts (Atom)